How to choose artwork for your home or workspace?
Installing artwork in your residence or place of work can make a profound style statement piece for your décor. Making the choice as to design, material, subject matter and so forth can also be daunting for most people.
Some thoughts to consider:
your own personal style (you live with this art, it should be something that gives you pleasure every time you see it) and color sense. The options for mosaic are just as varied as any other artwork. It should be a collaboration and work back and forth with the artist of your choosing to create something that is unique to your space and your personal style. Below are some ideas for your inspiration…
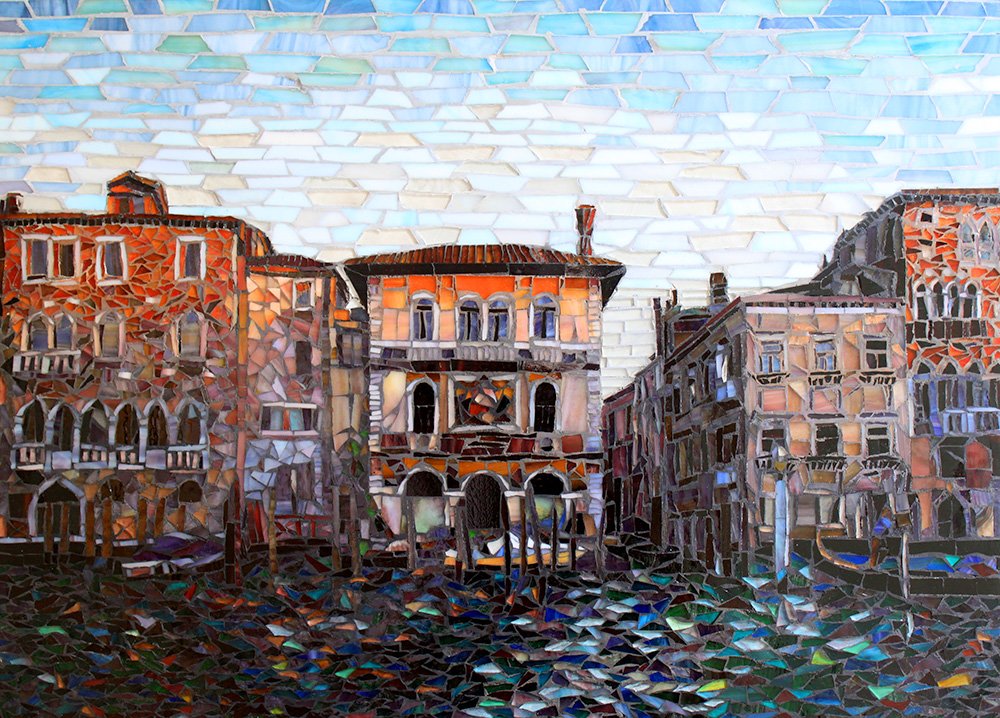
You can have a painterly piece like this backsplash in a European inspired home:
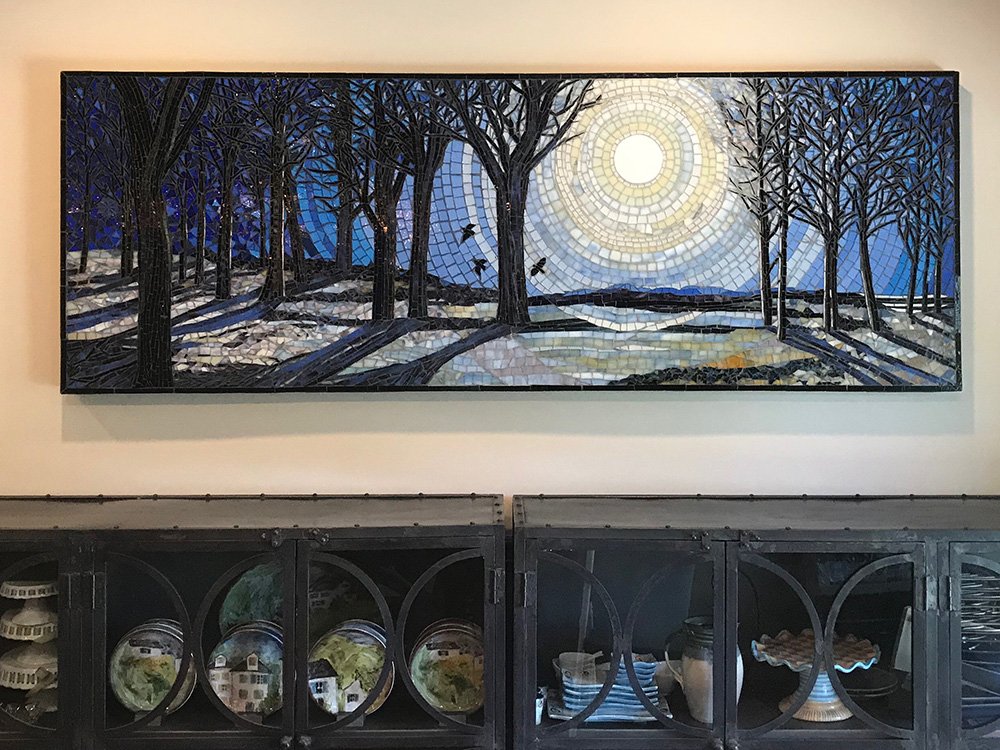
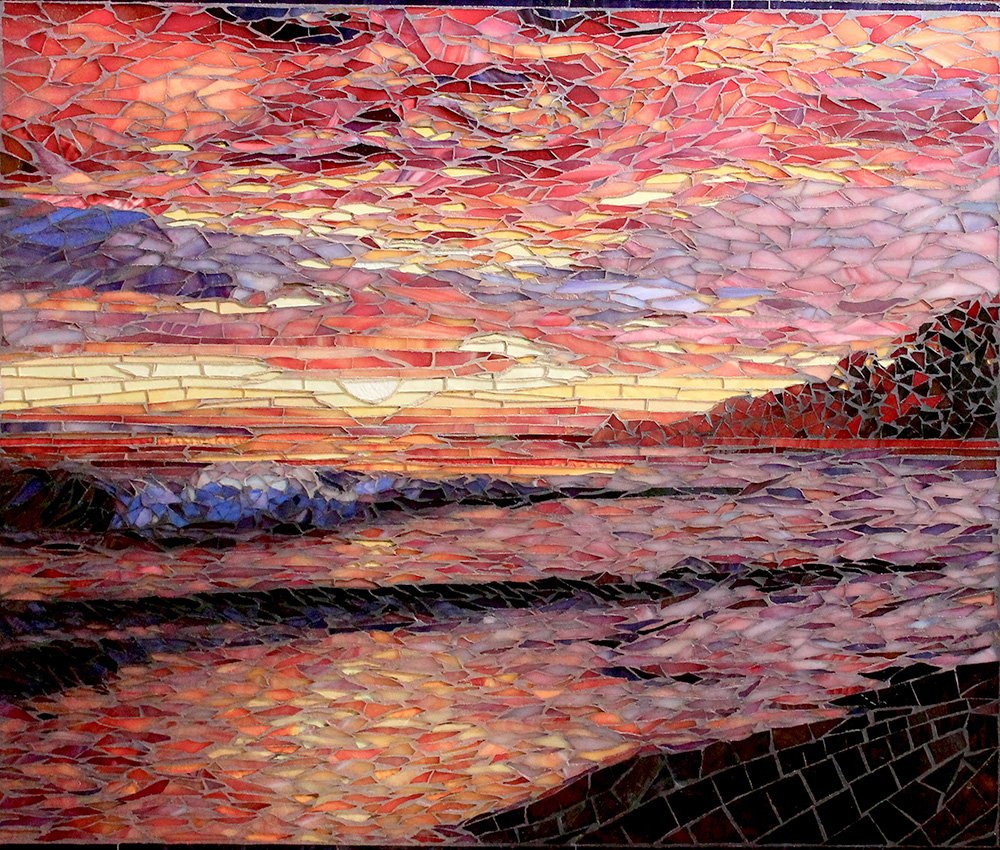
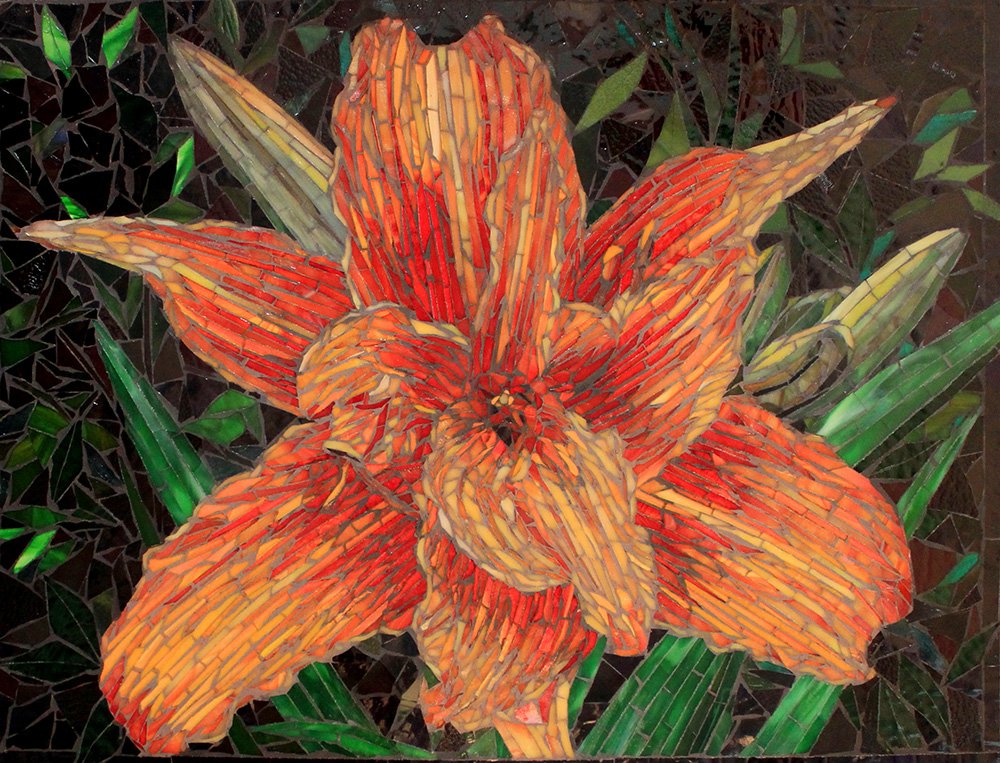
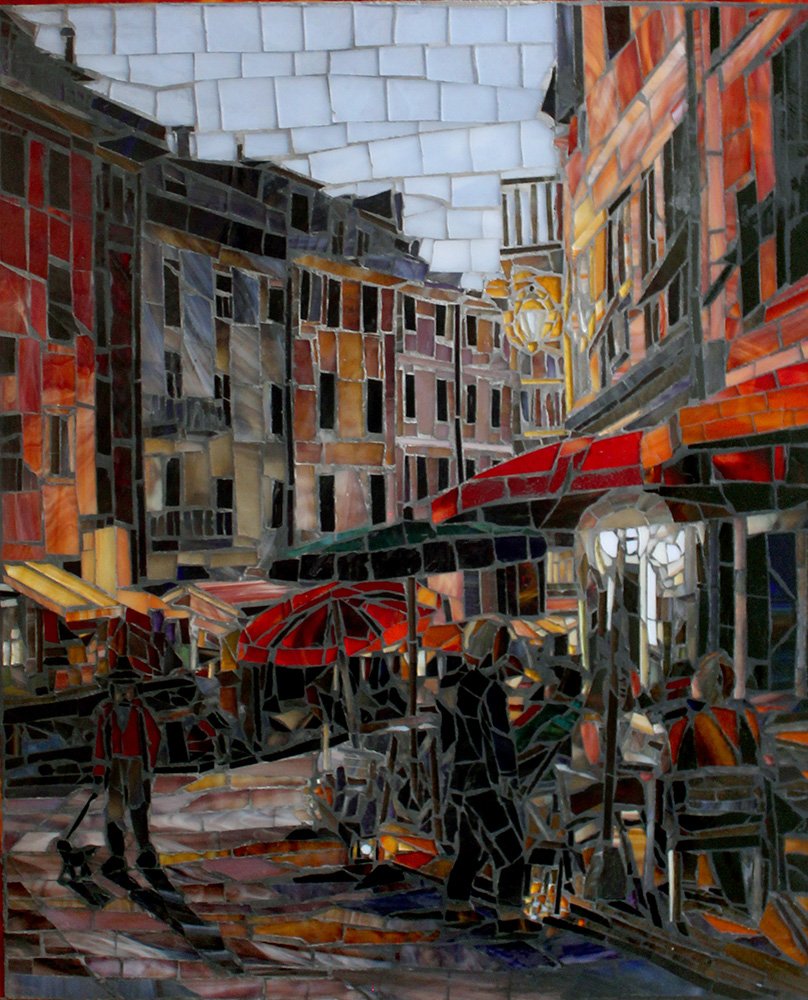
A colorful floral or cityscape of a special place…

Moonlight on the Seine glass mosaic

Fiori glass mosaic
A traditional piece like this marble floor or installation in a wine cellar using gold smalti…

Marble mosaic floor and gold and smalti wine cellar insert
An abstract in subtle colors or a bright painting for a statement piece…

In Black and White glass mosaic and Apples on a Red Cloth oil painting on canvas.
Other considerations:
Where will the work be placed; is it permanent or will it be transportable? You can have a mosaic backsplash in your kitchen that can be installed like a single large tile. It can later be removed and transported to a new location. Our mosaic work in kitchens and bathrooms is very smooth on the surface so that it can be easily cleaned just like tile work. Mosaic makes a unique and beautiful framed art piece.
What materials to use? Glass is an excellent option in most areas because it is vitreous (impervious to water) and will work on anything from outdoor fountains, backsplash, fireplace surrounds, murals, bathrooms, floors and so much more. Marble is great for floors or walls, indoor or outdoor. Smalti is a wonderful option as well. Smalti originated in Italy, is cut from a large glass pancake, has gorgeous color and texture and is very expensive.
How to clean a glass mosaic. For a glass mosaic with sanded or unsanded grout, the best way to clean the glass is simply with warm water and a few drops of dish soap with a small amount of alcohol. Use a sponge to wipe the glass clean, then polish with a soft cloth. The grout should be sealed once a year with a grout sealer from a hardware store. Just follow the directions on the product. If epoxy grout is used, you should just check it periodically for shrinkage or any separation from the glass or tile, but it does not need to be sealed.
Please let us know with any and all questions!
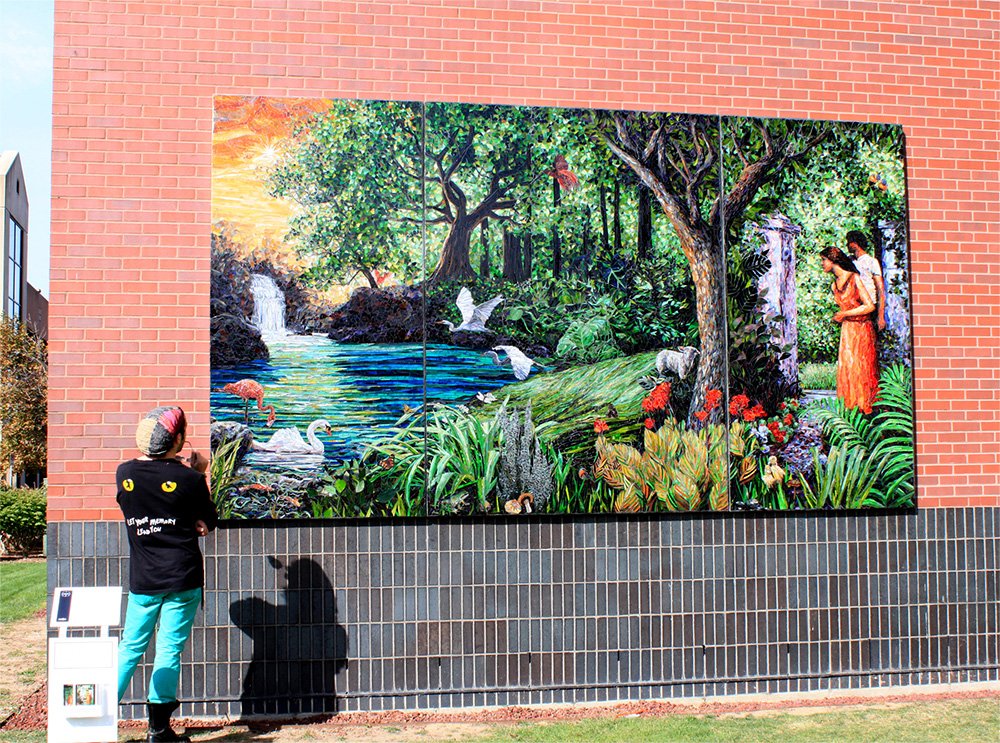
Mosaic Mural start to finish

Closeup of the Majesty mural created for the Maple Lane Residential Treatment Facility in Centralia, WA in conjunction with the Washington State Arts Commission.
How is a mosaic actually created? I assume there are lots of ways to do the actual creation and it also depends on what kind of mosaic - kitchen back splash, shower insert, fine art to hang on a wall, a large mural , the options are pretty open. But basically the process will be close to the same. So for this article I will use the steps we take to create a mosaic mural that will be installed directly onto a prepared wall surface.
So, you get a commission to create a mosaic mural for a large wall, now what? The first step is to create the design for the mosaic. First, you discuss the project with whoever gave you the commission. This could, for example, be an individual, an art committee, an art consultant, board of directors. We discuss with them what their vision for the artwork is. Our job, as the artist, is to keep them all focused on the main points of interest and to help bring their general ideas into some kind of harmony and consensus. I should mention here that when we design art work on commission it is important, to us, to be sure that the mosaic backsplash, mural, etc. be something that they have had personal input on. They are the ones who will be living with the mosaic and it should be something they truly love and feel connected to.
We take the ideas and suggestions from this meeting; do research of our own into the general topics discussed and to learn more about the specific area, culture, environment and community. The next step would then be to distill all this information and come up with 2-3 different designs that interpret what we have learned in an artistic and appropriate manner. These options are then presented to our client(s). Our job then is to listen to what they like, don’t like, don’t see, and more. We also try to get them to narrow down their options to just one deign. Then we go back and rework the designs to best incorporate what we heard. This back and forth continues until we have settled on a design for the mosaic mural that everyone has approved. At this stage we now have a final approved design and a full color, rough version of that design
Below are our three concept designs for the Texas Children’s Hospital mural. All design and artwork are copyright the artist.

The chosen design was the Carousel for this job. The next step is to start creating the mosaic mural. But first I would like to briefly talk about the tools and materials that we need for this step. Of course #1 on our list is glass. Our mosaics are almost always made with stained glass. Although we have done some with marble and some with other objects like glass jewels, beads and such. For the mosaic mural we will be working on we determine the colors that we want to use, search our inventory to see what we have and then we place our order with our supplier. Lucky for us that vendor is not too far away and we are able to get most of our orders shipped to us within 2-3 days. We usually buy full or half sheets of the glass that we need. Other items we use are glass cutters and breakers – to cut the sheet glass into manageable pieces, a pair of glass nippers – like a pair of pliers but with little wheels for cutting the glass, we use these to hand cut each piece of glass that goes into the mosaic. We also use clear contact paper, masking tape and an enlarged black and white pattern of our design and heavy duty tile tape. Your work space is also important, for large mosaics you need a reasonable size work surface. Our largest public art mosaic mural was 12’ x 44’; obviously we don’t have space to do something that size all at once. And if we did, how would we reach to fill in the middle? We find that the widest surface that works for us is about 4’, and then we can reach the middle area easily. We were able to create a level work surface a little over 12’ long and four feet wide.
Once you have your work surface you prepare it for piecing the mosaic. Our method is to take the finalized art work design and have it blown up to the actual mosaic mural size, in black and white. We use a local digital imaging printer who is capable of printing large images. The completed pattern comes back to us in black and white and rolls up to 12’ long and 2’ wide. We place the pattern on the work surface where we can get the full length but only 4’ of the width. Then we cover this pattern with clear contact paper, sticky side up and tape everything to the work surface. So, how so do we make the rest of the mural when it is 44’ wide? We piece the first 4 feet then remove all but a few inches, discussed later. Then we move the leftover section to the other side, of the work surface, and put the next part of the pattern on the work surface. We carefully match it up to the pieced section we left, cover the new pattern part with contact paper and continue onwards.
Finally, we are at the stage where we actually get to create the mosaic mural. We call this part “piecing” as we are placing the “pieces” of glass that will make up the final mosaic (we usually “piece” a mosaic from left to right) Each piece is hand cut. We place colors to match the design and use different shades/hues to define shadows, lights and darks, etc. Our approach is to use the glass just like we would if we were using a brush and paint. Shape and piece size are also used with this approach in mind. It all comes together to create the overall image. Like an impressionistic painting when you look up close to a mosaic you see each individual piece of glass, but when you step back you see the overall picture. On piece sizing, the more detail you want to show in a particular object in the mural the smaller the pieces will be to get all the nuances and minute color changes to show. If you want to just give the general idea of the object you can use larger pieces. We have estimated that some of the mural more detailed sections of our mosaics can contain well over 1,000 pieces per square foot. An advantage to using the contact paper is that we can piece the mosaic face up and we can easily move pieces around, or change the color, until it looks just the way we want. When this section is all pieced and everything looks just right we put a layer of heavy duty tile tape over the top of it all. This tape is thicker and stickier then the contact paper. (Before we put the tape on we take pictures so we can have in progress pictures for the client to review and see if they are still on board with how things are looking)When the mosaic is all covered with the tile tape we cut it into puzzle pieces. The first cut is normally a strip the length of the section just pieced, a few inches wide. This is then used when we start piecing the next section of the mural, so that everything lines up in a cohesive manner in the final product. Then we start cutting the “puzzle pieces”. Be careful not to make these pieces to big (you need to be able to easily handle them on site, even on a ladder 10’ up in the air) and also number them on the face of the tape so you can reassemble them easily on site. We then take the puzzle pieces, put them between 2 pieces of cardboard and flip them over. Now the back side is up and we press down, carefully, to make sure the glass is attached to the tile tape and we then remove the contact paper from the back and throw it away. Sometimes a piece will decide to stay stuck to the contact paper, instead of to the tile tape and need to be corrected, so pay close attention. Set these pieces someplace out of the way for now. We then slide over the edge strip that we left to the other side of the work surface, lay down the next part of the pattern, and line it up to the finished strip you just moved, so that everything flows properly, cover it with the contact paper and continue the piecing. To make the onsite installation easier, when the mural is all pieced and cut into puzzle pieces, we grout, and clean, those pieces from the back side. (For those of you new to mosaics, there is space between the pieces and to connect them all together you grout them to fill in those spaces) Be careful as everything is fairly stable, but the grout is wet and you need to be careful that it doesn’t get the mosaic puzzle piece so wet that pieces start coming off the tile tape. If you grout and do a general clean to get most of the excess off you should then set it aside to let it setup a bit. You are trying to get it to a point where there is mostly just a grout haze left and most of the actual grout is off the back of the glass pieces. Remember to do the initial clean not too long after grouting. Otherwise the grout will begin to set and be much harder to clean off. It is usually okay to wait until the next day to do the final clean, you want to get the back as clean as possible so that you don’t have problems with the glass adhering to the mortar when you install. We use a premixed grout with polymer added.
You want to wait to do the grouting until just before you ship the pieces for installation, but, the pieces are fairly stable and remain a little flexible so that when you install them they are still not too bad to work with if you are careful. After we grout and clean we take each piece and place it on a separate piece of cardboard, that is bigger than the piece, and carefully tape it down so that it doesn’t move during shipping. We put these into stacks of 5, put another piece of cardboard on top and tape the whole package tightly together. We then place the packets into sturdy boxes, pack them well and ship them to the installation site.
We are now up to the final step, installing the mosaic mural. Some of the supplies you need will be rags, paper towels, mortar, grout, buckets, tape, glass nippers, glass cutter, glass breaker, extra glass, drill with mixer attachment for the mortar and glass cleaner. Some of this you can buy onsite at local stores and some you will have to bring with you. Remember that nothing ever goes perfectly as planned onsite, so be prepared to make adjustments as you go. Sometimes the art site is not properly prepared; the size is a little different from the original dimensions or any number of other little things that can come up. Also, check to be sure you have access to water onsite, ladders if you need them, maybe you will have to arrange rental of scaffolding. You should also check to see how clean you need to leave the site when done working each day, what are the hours you can work, and where power is available.
The first step is to be sure the surface to which the mosaic mural will be attached is suitable and properly prepared. We check ahead of time to know what the surface will be. Some surfaces will be perfect just the way they are, some will need to be cleaned and others will need additional work or substrate to be suitable for installing a mosaic. Most concrete walls are suitable as they are, but they need to have a fairly smooth finish, if the walls are plasterboard or some other similar surface they need to be covered with material more suitable for accepting a wet mortar base and the weight of the mosaic. Plywood, sealed with primer, with a layer of concrete backer board on top is one solution we have used. In place of the concrete backer board we have also used a lighter version called Wedi Board or Hydro Blok – both are lighter versions of the concrete board. They have a layer of foam in the middle and a thin coat of concrete on either side. After any substrate is added make sure the surface to which the mosaic is being attached is clean, then you are ready to begin attaching the mural. Arrange your puzzle pieces so that you have them in the order you wish to attach. For mortar we use a thinnest, white mortar with polymer added. The polymer lends it extra strength and flexibility; mix the mortar according to directions on the bag. (make only as much mortar as you can reasonably you use before it starts to setup, again, read the directions on the mortar bag) We apply the mortar to the wall, like you would if you were tiling your bathroom at home, and we also put a thin layer on the back of the puzzle piece we are attaching. Then we carefully pick up the puzzle piece and place it on the wall. You must be careful to get each piece in place straight and aligned with other pieces or the whole mural will get off and cause problems as you get further along. Once all the pieces are up and the mortar has had a chance to dry you remove the tile tape on the face of the mosaic mural. The next step is to grout the seams between the puzzle pieces and to top grout the whole mural to fill in any areas where the grout didn’t get pushed all the way through during the back grouting process. The next step is to clean, clean, clean. We wipe the whole mural down with sponges and kitchen scrapers to get any remaining grout off, and then use a light glass cleaner and paper towels to clean the glass. If you are putting any kind of frame around the mosaic mural you can do that now or you can choose to frame it first, your choice as to what works best for you.

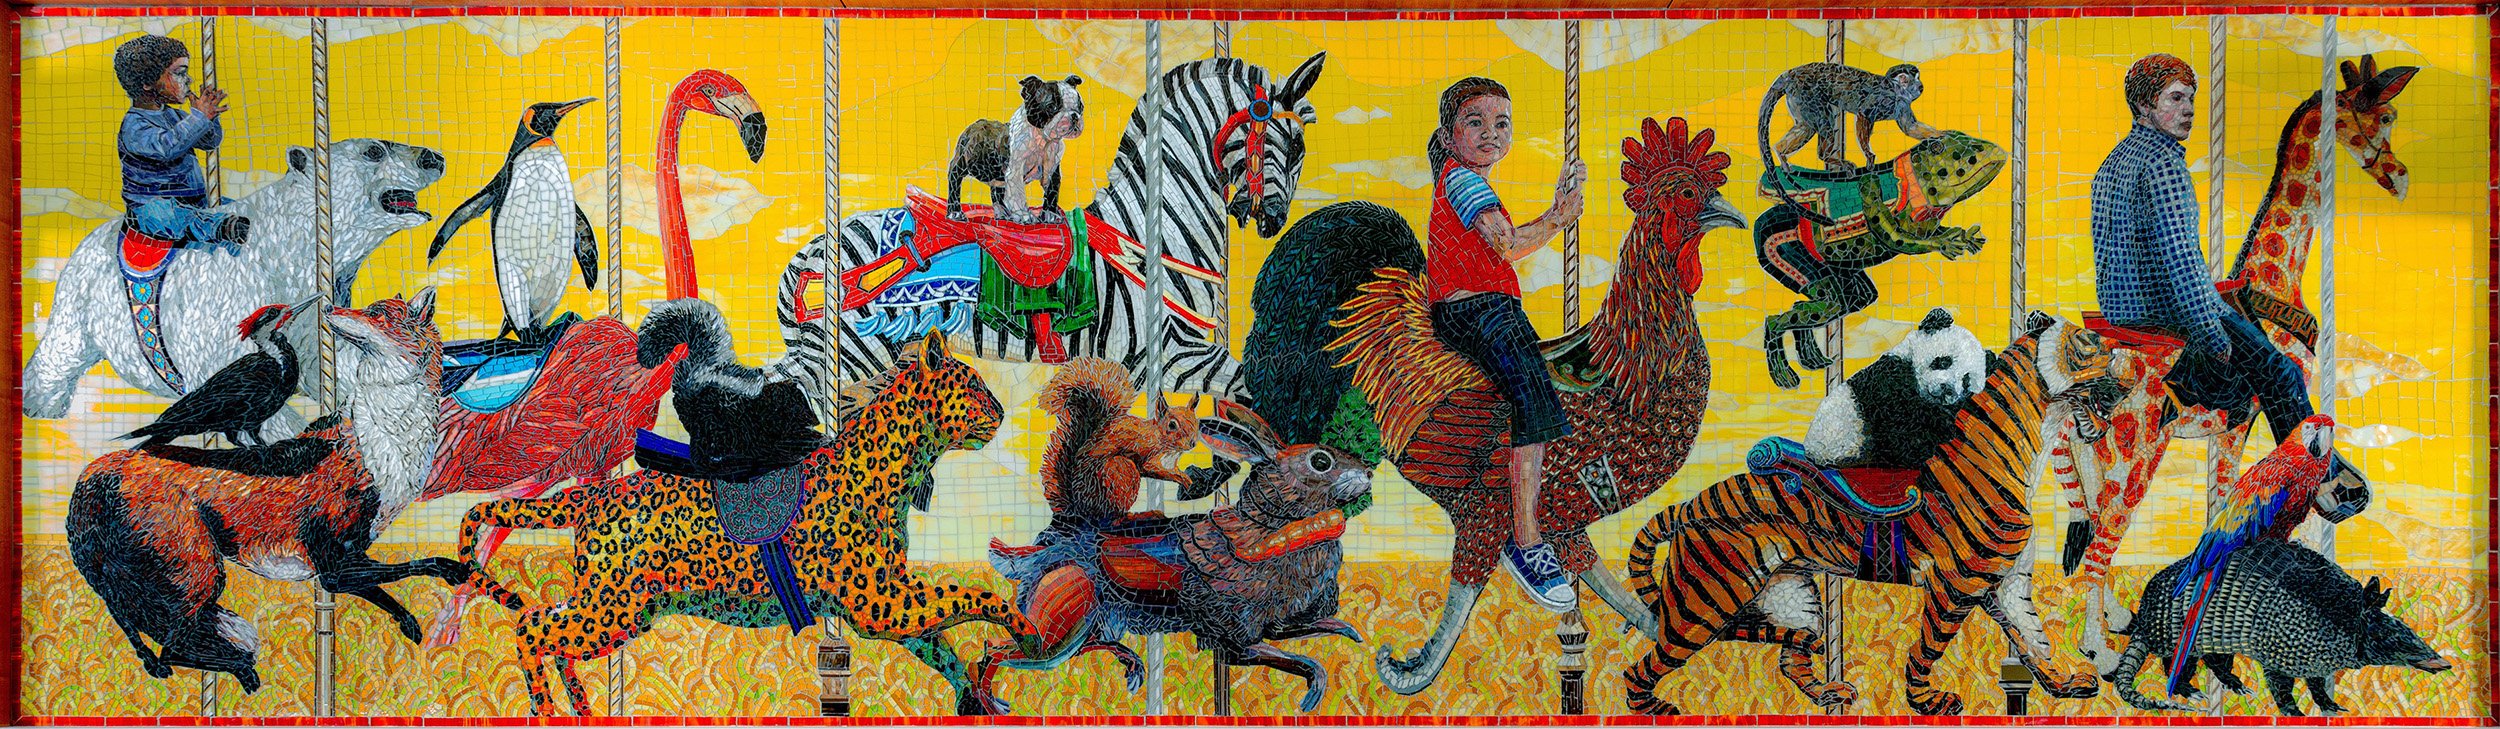
Carousel mural Texas Children’s Hospital, Houston, TX Photo credit Wyckoff Photography

Pathway to Art
Pathway to Art
It’s such an interesting journey, how artists come into being. There are those that know from an early age that this is their passion and have the confidence and drive to go forward without any detours. They go to art school and learn all the basics, spend hours in artistic practice, develop their style and go forth into the world. And then there are those of us who lack that confidence and maturity at the ripe age of 18 and end up getting a degree in accounting. We work for 25 years, all the while with that burning dream, practicing our art and learning as we are able but with the pressures of family and life dictating our path. There is beauty in that and no regrets.
When our children left home, my husband and I made the commitment to transition to making mosaic art for a living. We worked two jobs for several years, working during the day and then making our mosaics on our living room floor evenings and weekends, painting and composing new pieces, learning our craft until we became proficient and felt we had found our artistic voice.

The Skagit - 2006 Lucille Umbarger Elementary School, Burlington, WA
We ultimately created a small inventory of finished work and then were accepted into the Washington State Public Artist Pool and received our first big job for a newly built elementary school. We had a few hiccups in this mural making process, but it was ultimately successful and a jumping off point. Sandy went to Oakland, CA for a large mosaic mural intensive course and we received our second large mural job for the Missouri Transportation Authority to make a mural for the State of Missouri. This was to be installed in their new Welcome Center as you entered the state from Iowa in the North on highway 95. This was our largest piece to date (and since) at 12ft x 44ft and a large mosaic “map” of the history and natural landscape of northwestern Missouri. We still get calls from travelers about this mural which is such a pleasure.

Missouri Spirit 12ft x 44ft Welcome Center, Eagleville, MO
Since then, we have made many hundreds of smaller commissions, both painted and mosaic, over 30 large mural pieces all over the United States, hundreds of small fine art pieces in galleries, museums and homes, painted murals, floors, and sculpture. We have worked with, learned from, and gotten to know many wonderful people. Life has been enriched by this experience in so many ways.
When we first went full time to art, our family and friends wondered if we had lost our minds and were going through a midlife crisis. Maybe that was so, but after 22 years of making art full time we’ve never regretted the choice. Life is short. It goes by very fast.
Was it frightening and fiscally irresponsible to make this change from something steady and reliable to something totally not? For us, yes. I think that people who have art in their blood have something they want (or need) to express. Whatever that is, be it political, spiritual, or just plain fun, there is a reverence found in making art. Even art that is, by its nature, irreverent! It is a message to people in the future that this is what our world was like, what was important or special or beautiful about this place and time we live in.

For Life - Glass mosaic art
Personally, I celebrate the beauty of our world. Whether it's something in nature, or something built, or eaten, or made, or seen on a drive down the road, whatever wonderful thing that speaks to me. There will never be enough time to create all the artwork stored up in our minds through those 25 years of tax seasons. Whether you collect art, or make art, or sing or dance, it’s important to just do it.